How to Carbonate Your Beer
- Dec 28, 2021
- 64
- tiantai
There are two main methods for force carbonating a homebrew keg, both of which are very similar with the main difference being the amount of time it takes to carbonate.
With both methods, we’ll assume that you are using a standard homebrewing-type Cornelius keg that is fitted with ball lock-style liquid and gas posts. This type of keg is by far the most common and recommended serving vessel for homebrewers when it comes to kegging their own beer.
Preparation
First, you must install a ball lock conversion kit to your existing kegerator lines. This is a simple procedure that allows you to connect the liquid and gas lines to your kegerators existing lines without sacrificing the ability to connect to standard ball bearing style kegs. Once you have installed the ball lock conversion kit, you’ll need to prepare the gas line for attachment to the keg.
A Cornelius keg is built with two posts—one for gas and one for liquid. The liquid post is attached to a dip tube that goes all the way to the bottom of the keg. As gas flows in from the top of the keg, it helps build pressure within the keg to dispense liquid from the bottom of the dip tube all the way out the top and through the liquid line.
In carbonating, you want to do the opposite and directly send CO2 gas down through the dip tube so it will rise up through the beer. This will increase the surface area between the CO2 bubbles and beer for a more efficient carbonation process.
To prepare the keg, first remove the gas socket from the gas line and set it aside in a safe place. Then, remove the black liquid socket from the liquid line and attach it to the gas line. The sockets are only designed to attach to their respective posts so doing this allows you to direct gas through the liquid post.
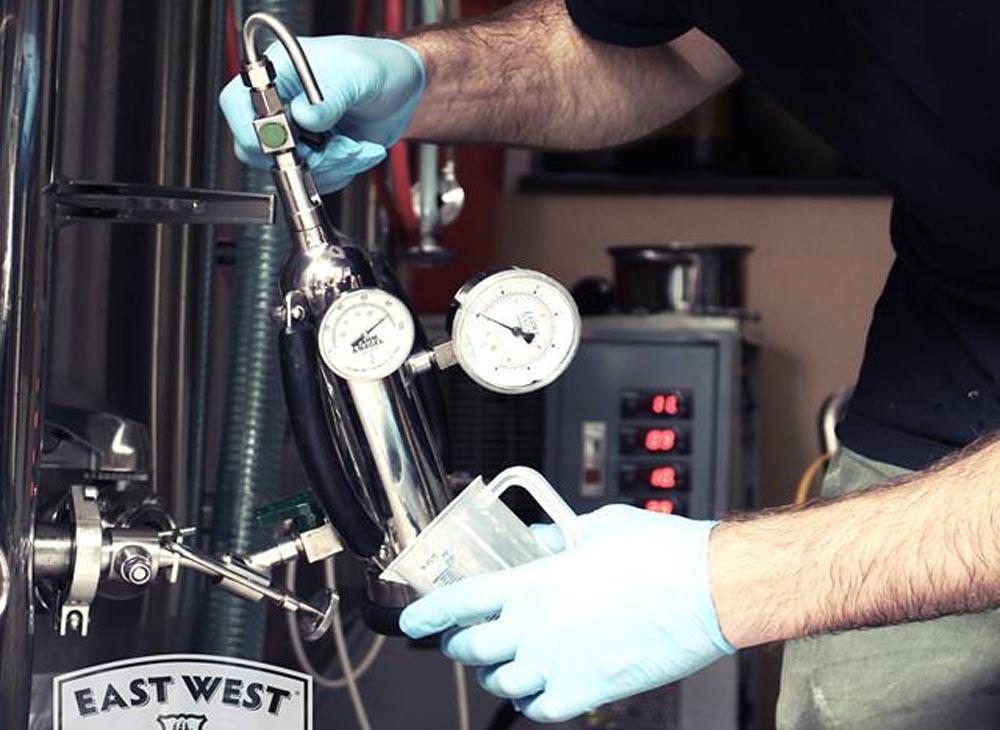
Once you have done this, slowly turn on the gas cylinder to 5 psi and check for any leaks in the line, at the liquid post or around the lid of the keg. The next step is where the methods differ.
Force Carbonation Methods
Method 1:
In the first method you will use a lower level of CO2 pressure and carbonate for a longer period of time.
With the gas line free of leaks, use the keg’s pressure release valve to briefly bleed off some gas to ensure that gas is flowing through the entire keg as it should. In addition to hearing the release of gas as it exits the keg you should also listen for bubbling, which will indicate that CO2 is properly running from the gas cylinder, through the regulator and gas line, down through the dip tube, and up through the beer.
Once you have confirmed that the entire system is working properly, adjust the regulator to raise the pressure to 20 PSI. Allow the keg to carbonate for 7-10 days, and then check the carbonation levels.
Remember to switch and reattach the gas and liquid sockets to their proper lines and to lower the gas supply to serving pressure before doing testing.
Method 2:
The other force-carbing method is similar but will carbonate at a faster rate. However, it’s important to note that it involves more effort.
First, attach the gas supply to the keg in the same manner as the first method. Once the system is hooked up, turn the gas supply up to 30 PSI.
Then, gently shake the keg to stir up the beer inside. You should immediately hear bubbling within the keg. Agitating the keg increases the contact area between CO2 and beer even further, promoting faster diffusion of CO2 into the beer.
Continue to shake the keg for 20-30 minutes then lower the pressure to 20 PSI and allow the keg to carbonate for 2-3 days. Check the carbonation levels and enjoy!
Other Things to Consider
While the PSI levels mentioned in the previously explained carbonation methods are good recommendations, it’s important to fully understand that temperature plays a part in how proper CO2 volumes can be achieved when carbonating. The lower the temperature the faster the CO2 dissolves into the beer, therefore less CO2 pressure is needed to carbonate to the desired volume.
The chart illustrates this concept and will help you get the CO2 pressure and volume exactly right in your brew. Find the temperature at which you will be carbonating, and then find the desired volume of CO2 within that column. To achieve the right level of carbonation, supply the corresponding amount of gas pressure, found in first column.
As a reference, the following are general volumes of CO2 that are typical of popular beer styles:
1.50 – 2.00: Stout, Barleywine, most English ale
2.01 – 2.60: Porter, Lager, most American ale
2.61 – 3.10: Most Belgian and German ale
Keep in mind that you should not simply crash the temperature of your beer to carbonate it in the least amount of time. You should store it at a temperature that is appropriate for the style and simply adjust carbonation pressure levels accordingly.
Also, a mistake that homebrewers often make is to begin the carbonation process immediately after transferring the homebrew from the fermenter to the keg. This often involves lowering the temperature of the beer while introducing CO2 to make for a more efficient carbonation effort. This issue with this is that diacetyl, which is a natural byproduct of the fermentation process, does not have ample time or the proper temperature environment to reabsorb into the yeast.
If you fail to you’re your beer a rest time of two days at room temperature after final gravity has been reached, the presence of diacetyl will be much more noticeable in your beer in the form of unwanted buttery, popcorn-like flavors.
With both methods, we’ll assume that you are using a standard homebrewing-type Cornelius keg that is fitted with ball lock-style liquid and gas posts. This type of keg is by far the most common and recommended serving vessel for homebrewers when it comes to kegging their own beer.
Preparation
First, you must install a ball lock conversion kit to your existing kegerator lines. This is a simple procedure that allows you to connect the liquid and gas lines to your kegerators existing lines without sacrificing the ability to connect to standard ball bearing style kegs. Once you have installed the ball lock conversion kit, you’ll need to prepare the gas line for attachment to the keg.
A Cornelius keg is built with two posts—one for gas and one for liquid. The liquid post is attached to a dip tube that goes all the way to the bottom of the keg. As gas flows in from the top of the keg, it helps build pressure within the keg to dispense liquid from the bottom of the dip tube all the way out the top and through the liquid line.
In carbonating, you want to do the opposite and directly send CO2 gas down through the dip tube so it will rise up through the beer. This will increase the surface area between the CO2 bubbles and beer for a more efficient carbonation process.
To prepare the keg, first remove the gas socket from the gas line and set it aside in a safe place. Then, remove the black liquid socket from the liquid line and attach it to the gas line. The sockets are only designed to attach to their respective posts so doing this allows you to direct gas through the liquid post.
Once you have done this, slowly turn on the gas cylinder to 5 psi and check for any leaks in the line, at the liquid post or around the lid of the keg. The next step is where the methods differ.
Force Carbonation Methods
Method 1:
In the first method you will use a lower level of CO2 pressure and carbonate for a longer period of time.
With the gas line free of leaks, use the keg’s pressure release valve to briefly bleed off some gas to ensure that gas is flowing through the entire keg as it should. In addition to hearing the release of gas as it exits the keg you should also listen for bubbling, which will indicate that CO2 is properly running from the gas cylinder, through the regulator and gas line, down through the dip tube, and up through the beer.
Once you have confirmed that the entire system is working properly, adjust the regulator to raise the pressure to 20 PSI. Allow the keg to carbonate for 7-10 days, and then check the carbonation levels.
Remember to switch and reattach the gas and liquid sockets to their proper lines and to lower the gas supply to serving pressure before doing testing.
Method 2:
The other force-carbing method is similar but will carbonate at a faster rate. However, it’s important to note that it involves more effort.
First, attach the gas supply to the keg in the same manner as the first method. Once the system is hooked up, turn the gas supply up to 30 PSI.
Then, gently shake the keg to stir up the beer inside. You should immediately hear bubbling within the keg. Agitating the keg increases the contact area between CO2 and beer even further, promoting faster diffusion of CO2 into the beer.
Continue to shake the keg for 20-30 minutes then lower the pressure to 20 PSI and allow the keg to carbonate for 2-3 days. Check the carbonation levels and enjoy!
Other Things to Consider
While the PSI levels mentioned in the previously explained carbonation methods are good recommendations, it’s important to fully understand that temperature plays a part in how proper CO2 volumes can be achieved when carbonating. The lower the temperature the faster the CO2 dissolves into the beer, therefore less CO2 pressure is needed to carbonate to the desired volume.
The chart illustrates this concept and will help you get the CO2 pressure and volume exactly right in your brew. Find the temperature at which you will be carbonating, and then find the desired volume of CO2 within that column. To achieve the right level of carbonation, supply the corresponding amount of gas pressure, found in first column.
As a reference, the following are general volumes of CO2 that are typical of popular beer styles:
1.50 – 2.00: Stout, Barleywine, most English ale
2.01 – 2.60: Porter, Lager, most American ale
2.61 – 3.10: Most Belgian and German ale
Keep in mind that you should not simply crash the temperature of your beer to carbonate it in the least amount of time. You should store it at a temperature that is appropriate for the style and simply adjust carbonation pressure levels accordingly.
Also, a mistake that homebrewers often make is to begin the carbonation process immediately after transferring the homebrew from the fermenter to the keg. This often involves lowering the temperature of the beer while introducing CO2 to make for a more efficient carbonation effort. This issue with this is that diacetyl, which is a natural byproduct of the fermentation process, does not have ample time or the proper temperature environment to reabsorb into the yeast.
If you fail to you’re your beer a rest time of two days at room temperature after final gravity has been reached, the presence of diacetyl will be much more noticeable in your beer in the form of unwanted buttery, popcorn-like flavors.
.jpg)