How to do mashing with Your Beer Brewing Equipment
- Aug 10, 2021
- 146
- tiantai
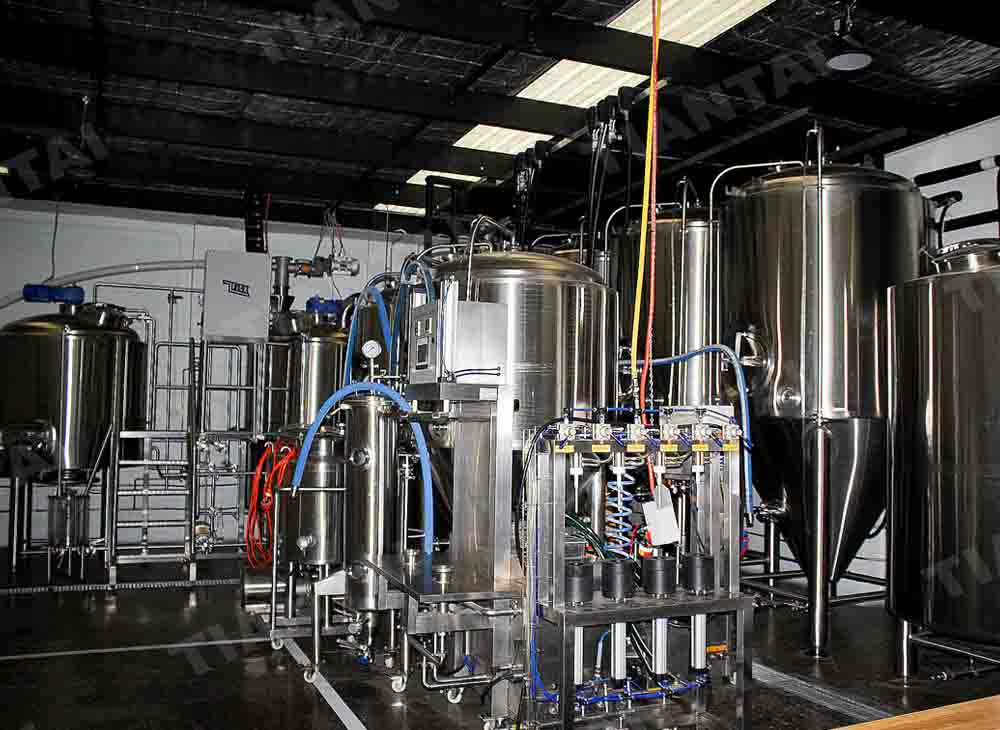
A lot needs to know to build your own brewery like brew tech,brewery equipment configuration,beer brewing equipment,conical fermenters,conical fermenter,fermenter conical,fermenter beer,conical fermentor, brewery equipment cost and price,find a location for brewery install, license and regulation of brewery. This article column is specially to answer some common question during brewing.There are many ways to approach your first all-grain brew day with all grain brewing Equipment. Now we finally can do the first brew now. The first step is the mashing in. We will do this with our beer mashing equipment in brewhouse.
Mashing In
Once your equipment is set up, you will need to start heating your strike water (fancy term for the brewing water adding initially to the mash). The amount of strike water required varies between 0.95 and 2.4 quarts of water per pound of grain (2–5 L/kg), and a good consistency — or mash thickness — for most beers is 1.25 and 1.375 qts./lb. (2.6-2.9 L/kg). So, to figure out how much water you need, take the weight of your grains and multiply by some number between 1.25 and 1.375 (or 2.6 through 2.9, if you use the metric system). The lower numbers will give you a little thicker mash than the higher numbers, although the specified range is all in the "moderate" range of mash thickness.
If your mash vessel has a false bottom, add the volume under your false bottom to the amount of strike water you need to heat. For example, if there is a gallon (3.8 L) of space under your false bottom, add this extra 1 gallon (3.8 L) of water to your strike water. All-grain brews require heating larger volumes of water than most extract brews, so be prepared for this step to take longer than you might think. If you have a metal mash paddle, set it in the HLT while the strike water is heating.
Mixing the crushed grains and hot strike water is called mashing in. The goal is to mix the crushed malt and water so that the grain bed settles in at your target temperature (which will be given in the homebrew recipe) and that this temperature is as uniform as possible throughout the grain bed.
The initial temperature after mash in depends mostly on the temperature of the strike water, the temperature of the crushed malt and the temperature of your mash vessel. There are equations that can help you calculate the temperature of your strike water, but most homebrewers "solve" this problem by using a generic recommendation and refining it with trial and error. One generic recommendation works fairly well if your grain and equipment are in the vicinity of "room temperature," and you use a mash thickness between 1.25 and 1.375 qts./lb. (2.6-2.9 L/kg). This is to heat your strike water to 11 °F (6 °C) above your target mash temperature. This assumes no, or minimal, heat loss when transferring your water to your mash tun.
Once you've heated the measured amount of strike water and transferred it to the mash vessel, check again to see that it's in the right range (9–10 °F/5–5.5 °C above your target). Then, stir your crushed grains into the strike water. To do this, simply add a pound or so of grain to the water, give a quick stir with your mash paddle until it dissolves and repeat until all the grain is stirred in. Stir the grain for 20–30 seconds, looking to even out any temperature differences and break up any clumps of dry malt sticking together. Then, take the temperature and place the lid on your mash tun to conserve heat. Record the volume of the strike water, its temperature in your mash tun just prior to mashing in and the initial mash temperature. After several attempts, you will find an average temperature difference between the strike water temperature and the mash in temperature for your system.
Saccharification rest/Starch conversion
Now, you let the mash sit (or rest) for awhile. (The recipe should specify the length of this rest; often, it's one hour.) During the mash rest, your goal is to hold the grain bed at a constant, uniform temperature. Odds are, however, you won't be able to do this. At a homebrew scale, the mash will lose heat over the time of the rest. And, the sides of the grain bed will cool off faster than the center. Fortunately, a small change in temperature is not going to hurt the quality of your beer. After your first mash, quickly take the temperature near the side of the mash vessel, and then near the center. Stir the mash to even out any temperature differences and take the temperature again. Record all three temperatures in your brewing notebook.
If your overall mash temperature drops more than 2 °F (1 °C), or the temperature difference within the mash is greater than 4 °F (2 °C), you should insulate your mash tun better next time. You can use towels, sleeping bags or blankets for this. If your mash vessel is heatable, you can also add heat directly during the mash. If you do, stir the mash and do not heat too quickly. More advanced all-grain systems often utilize a recirculated method of holding or heating the mash. If you are interested in recirculating systems, please contact with us.
During the rest, you have the option of stirring. Stirring ensures a more even mixture of grain and liquid and evens out temperature differences across the grain bed. Unfortunately, opening the mash vessel releases heat to the environment. Likewise, using a "cold" mash paddle absorbs more heat from the mash. As such, most homebrewers simply leave their mash undisturbed during this rest. (If you overshot your mash temperature by a few degrees, stirring a couple times is great way to gradually bring the temperature down.)
Most homebrew recipes specify a one-hour rest for single infusion mashes.
Derrick
Sales Manager
[email protected]
Tiantai Beer Equipment

.jpg)